We all know very well that installing
Custom ROMs are one of the difficult task and lengthy process too. To install
Custom ROM firstly you have to root your device, after that install the
recovery and then flash the ROM on your android device. In case, if your devices
are with locked bootloader such as HTC One or Nexus then you have to firstly
unlock the bootloader to follow the installing process.
But if you wish to install CyanogenMod
ROM then no need to root your android smartphone. Even you haven’t to do lengthy
process your device. All credit goes to the CyanogenMod folks for introducing
the new Installer App. The app is very quick and simplest way to install a
custom ROM without rooting or without unlocking bootloader on android devices.
See also:
See also:
- How to Install Google Apps on Cyanogenmod CM11 ROM
- How to Install Kitkat Google Launcher on Any Android
This App is only available for Windows
Vista, Windows 7 and Windows 8. Also the app is available for various supported
devices. You can check out the list of supported devices from here:
How the installer works on Windows and
Android devices
Download the CyanogenMod Installer Android App and CyanogenMod Installer PC App on your Windows and Android
smartphone. After downloading you have to enable the USB debugging on your Android
devices to get started.
Firstly, run the downloaded android app
on your device and just follow all the onscreen instructions carefully. After
that connect your smartphone to the PC via USB cable and simply run the
installer PC app on your desktop.
Now your phone will be detected by the
installer and you will get the complete details of your device. And then the
installer will start to download its goodies such as CyanogenMod ROM and some other
recovery files for your android device.
It will take few minutes to finish. When all
the process will be completed for your device, then you will view the new
messages on installer app like “Everything is ready”.
Finally, make a click on the Install
button from the app screen and the flashing process will be start on your
device. During the installation, your android device will turn OFF and ON. So,
please do not disconnect or remove your device from the PC this time otherwise
you will brick your smartphone.
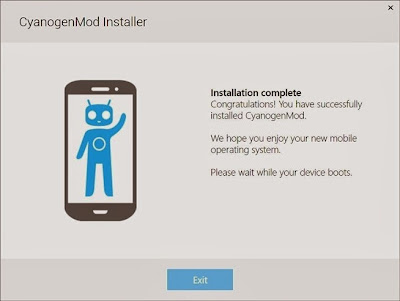
When the flashing process will be
finished on your device, you will receive the “Installation Complete” Message
on windows Installer app.
Congratulation! You have done. Now freely enjoy new ROM on
your android smartphone or table.
I hope you liked this Article. Feel free
to share your view with us through comments. Looking for more useful tips and
tricks, latest updates then check out our Tips for Android section.
Related article for you:
(2) A Simple Way to Transfer Files Between Two Smartphones
(3) A Simple Way to Download Android Apps on Your Desktop
(3) A Simple Way to Download Android Apps on Your Desktop


